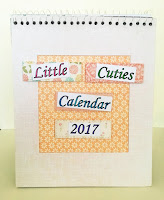
Hello.. Me again, Today I'm going to show you how i created this ring binder calendar. even through i made mine into a calendar this would easily work as a note book too. I have also made a video on how i have made this, which i have linked at the bottom of the page.
So for this you will need:
Calendar Pages
Ruler
Pencil
A Pen or something round (the size you want your wire binding to be)
Wire Cutters
A 3mm Single Hole Punch
A piece or card stock the same size as your calendar (This is to create a guide)
Clips
and Post its or some low tack tape.
To start you will need to create the guide for the holes that need to be punched for the binding
To do this you will need to measure 0.5 cm from the top then 3mm do this on both sides and draw lines across with a ruler
Fold in half to find the middle
Then from that mark, measure and mark every 3mm and colour in every other square... these will be where you will need to punch out the holes.
Line up the hole punch to these marks and start punching.
Doing only 4 pages at a time (if you are making a note book you will be able to do more then 4 sheets of paper at one time, i could only do 4 because of the thickness of the card stock i was using) line up the guide and hold into place using the post it notes and the clips.. the post its are mainly to keep the clips from marking your pages. Do this until all of the pages are done are all done.
To Make the wire binding count the number of holes you have made and Wrap the wire around the pen a few extra times (I needed 30 so made about 33 wraps around with the wire)
I cant remember what gauge wire i used, it was just some spare i had left from a previous project but it could have done with being a little thicker but it still done the job.
Get all of the pages into order, start to thread the wire through, It can be a little fiddly to start of with but after you have the first few holes done the wire goes in quite easily. Use the wire cutters to trim any extra wire you have left over.
This was the first one i made, and a test for the you tube video.. (my mum loved it so she stole this one)
All the digis i used were from digi stamps boutique go check them out they have some fabulous images there!
Don't forget to check out the video
Thanks for stopping by
Laura xx


No comments:
Post a Comment