
Hey guys, I'm back with another tutorial and this one is
about candle transfer or candle decorating I guess you could call it.
So for this you will need
A candle,
White tissue paper with your image either stamped or printed
(The image I used is my own )
Heat gun
Grease proof paper
Bull dog clips
And whatever brand of alcohol markers you like to use, I have
used Copic ciao markers in BV000, BV02, BV13

First start by deciding what image you would like on your
candle. If your using a digi stamp you will need to attach a sheet of white
tissue paper to a normal piece of printer paper a small piece of double sided
tape in the corners will do the trick, you do need to make sure the tissue
paper is crease free otherwise it will more than likely jam your printer I find
running an iron over will get rid of most creases, the printer I use is just an
all in one cannon ink jet so nothing special but does the job, or you could use
a stamp and ink pad. As soon as your image comes out, spay a little hair over
the image, but do it from a distance you don’t want to soak the image you just
want to lightly sprits it I find this helps with any colour bleed you might get
from the printer, then go and make yourself a nice cuppa tea or coffee and put
your feet up for around 20 minutes while it dries.
If your Colouring your images with alcohol markers, make
sure you have a piece of scrap paper under your colouring because
the tissue is so thin the markers soak through, so you need the scrap paper to
catch all that ink,


Once your image is all coloured, cut to size and decided
where you want it to go, wrap your candle with the grease proof paper and clip
it in place at the back, I have tried using pegs and just holding the grease proof
paper and even not using any grease proof paper what so ever!, and yes it still
works but the end result doesn't look good…. At all (so if you’re like me and
if it’s not perfect I will start all over again) use the bull dog clips
otherwise you will be starting from the beginning.
Heat the wax with your heat gun, you will see the tissue
paper disappear , and the colours on your image will look as if they are
getting brighter, you only need to hold the heat up to the candle few a few
seconds to melt a little of the wax otherwise you might end up an uneven
surface on the candle (unless that’s the
look you’re going for) do this over the whole candle, then leave the candle to cool down for a round 10 to 15
minutes and remove the grease proof paper slowly and you’re done.
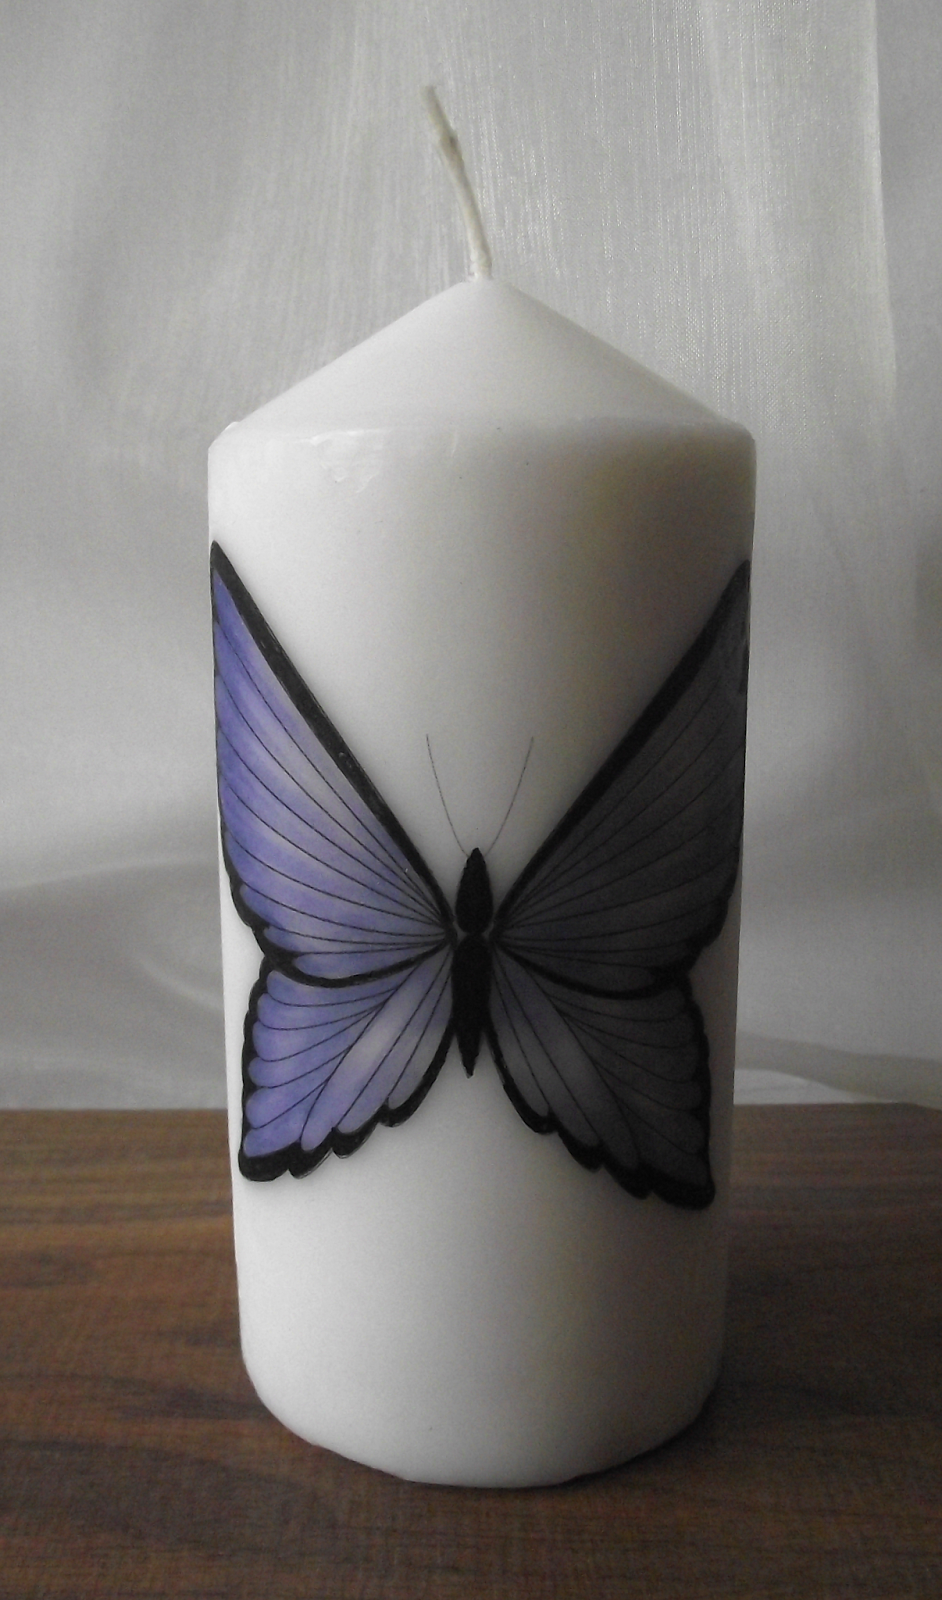
They make beautiful unique gifts for someone, and the design
possibilities are endless with a process that’s so quick and easy to do.
If you
like a free copy of my butterfly, just e-mail me at somethingfunkycrafts@gmail.com
and I will happily send it over to you in a jpeg format.
Thanks for reading, I hope you enjoyed.