Sunday 20 September 2015

Candle Decorating


Hey guys, I'm back with another tutorial and this one is about candle transfer or candle decorating I guess you could call it.
So for this you will need
 A candle,
White tissue paper with your image either stamped or printed (The image I used is my own )
Heat gun
Grease proof paper
Bull dog clips
And whatever brand of alcohol markers you like to use, I have used Copic ciao markers in BV000, BV02, BV13


First start by deciding what image you would like on your candle. If your using a digi stamp you will need to attach a sheet of white tissue paper to a normal piece of printer paper a small piece of double sided tape in the corners will do the trick, you do need to make sure the tissue paper is crease free otherwise it will more than likely jam your printer I find running an iron over will get rid of most creases, the printer I use is just an all in one cannon ink jet so nothing special but does the job, or you could use a stamp and ink pad. As soon as your image comes out, spay a little hair over the image, but do it from a distance you don’t want to soak the image you just want to lightly sprits it I find this helps with any colour bleed you might get from the printer, then go and make yourself a nice cuppa tea or coffee and put your feet up for around 20 minutes while it dries.

If your Colouring your images with alcohol markers, make sure you have a piece of scrap paper under your colouring   because the tissue is so thin the markers soak through, so you need the scrap paper to catch all that ink,


Once your image is all coloured, cut to size and decided where you want it to go, wrap your candle with the grease proof paper and clip it in place at the back, I have tried using pegs and just holding the grease proof paper and even not using any grease proof paper what so ever!, and yes it still works but the end result doesn't look good…. At all (so if you’re like me and if it’s not perfect I will start all over again) use the bull dog clips otherwise you will be starting from the beginning.
Heat the wax with your heat gun, you will see the tissue paper disappear , and the colours on your image will look as if they are getting brighter, you only need to hold the heat up to the candle few a few seconds to melt a little of the wax otherwise you might end up an uneven surface on the candle  (unless that’s the look you’re going for) do this over the whole candle, then leave the  candle to cool down for a round 10 to 15 minutes and remove the grease proof paper slowly and you’re done.


They make beautiful unique gifts for someone, and the design possibilities are endless with a process that’s so quick and easy to do.  
   If you like a free copy of my butterfly, just e-mail me at somethingfunkycrafts@gmail.com and I will happily send it over to you in a jpeg format.


Thanks for reading, I hope you enjoyed. 

Wednesday 3 June 2015


Hey back again, today I'm going to be going in to a little detail about colouring with my spectrum noir pens and pencils, but first things first I just want to tell you about the image I have used, this image is called Time For Tea, its an absolutely beautiful image of a fairy having a tea party with her teddy bear, I purchased this digital image from the crafts and me website www.craftsandme.co.uk
please go over and check out there shop, they have some stunning images and they are brilliantly priced as well.

ok so back to the colouring. I took the spectrum noir colouring accreditation test some time last year, and I love the pens (but to be honest they are the only ones I have tried so I haven't really got a compassion). Sometimes I will admit I have a little trouble getting the pens to blend (I don't know if anyone else has this issue maybe its just me) so I tend to stick to the same colour combo's, so what I tend to do now is combine the pens and pencils and I feel I achieve the outcome that I'm looking for.  


Smooth Blend

                Skin and check FS1 and CR3      Dress and pillow   HB1
Teddy, ears and wings EB1, PP1, IB1

I started first by laying down the base colour, with most of the colouring I was doing a smooth blend I then go back with the pencils and add the detail. 

 Stripy Tights
PP1, PP3, PP5 & LG4, LG2, LG1
To do her tights I first started off with PP1 colour then added the PP5 on each side of the stripe, then went in with the PP3 and finished off PP1 just to blend the mid tone to the lightest colour. (I love the effect it gave to her tights)


Table cloth & mushrooms

   Table cloth IB1, IB2, IB3                  Mushroom CR8, DR4, DR6
Stalks and teapot and cups GG1 GG2 GG3 and the blender
The table cloth and mushrooms where done in both the same way, I started by laying down the lightest colour, then adding the darkest where I thought the shadow should be, I used the mid tone to blend in the darker shade and finaly back to the lightest shade to blend the mid tone in. Once all the blending was done I decided I wanted some texture on the mushroom, Using all the reds starting dark to light, Adding little dots all over the mushroom. The stalks I done in the same way but starting with GG1 dotted all over, Then GG2 I didn't bring out as far, and GG3 I kept to the edge where I thought the shadowing would be, just to finish off with the blender dotting it all over to tone down the harshness of GG3 and bring the three colours together. 

The tea pot and cups I started by laying down the blender in the centre, adding GG1 and bringing out to where I had added the blender so GG1 would virtually disappear, switching to GG3 to add just a small suggestion where I felt the shadows should be and finaly to GG2 to blend the two colours together. 


 Hair
Hair GB 2 and GB8
I started with GB2 and flicked it in, Starting with her hair line and ending in the centre of her hair, doing the same starting with the back of her hair flicking in to the centre, ensuring I was leaving the centre white to give the illusion of a shine line, Then with GB8 doing the same thing but making sure I wasn't adding to much. 

 The sky


I decided I didn't want to add to much detail to the background and wanted to keep it pretty simple, when I had done a test for the video, I had down the sky is TB1, but when I came to do the video I picked up the wrong colour (IB1) but I don't think it looks to bad.  


                                             Adding the pencil


The dress


The main thing I want to talk about with adding the pencil is her dress and the grass, so starting with her dress, I started by taking the darker colour and mapping out where I wanted some of the dress folds to be more prominent, also not forgetting to add the shadowing.
then taking the mid tone and adding on the edge of the darker colour and taking it up to where the lightest colour was going to start, Using a paper stump and the blending fluid to bend all the colours together I had to go over it again with the darker colour just to make the dress folds stand out.


The Grass

I started off with the darkest colour and coloured all the drawn lines then shaded underneath and under all the flowers, Using all the blending fluid and a paper stump draw the down in to the white. 
Once you have down that and your happy with it, use the lighter green and draw some random grass tuffs blend them slightly and repeat, then finally go over them in the darker colour.
and just to finish the picture off I used some clear embossing powered mixed with glitter and perfect pearls mixed together and put it on her wings, her dress and the teddy's wings (because every little fairy needs a little sparkle)

I was really please with that way it came out, and I have a project in mind that I will be perfect for. 
I hope you enjoyed this
Please feel free to leave me a comment
Happy Crafting!
Colouring list
Fairy
Wings: PP1, 35, 29
Dress: HB1, 82, 80, 78 
Tights:LG4, LG2, LG1
PP5, PP4, PP1 
Skin: FS1, CR3, 8
Teddy: EB1, 95 
Wings: IB1, 74
Nose & Ears: PP1, 35, 29 
Pillow: HB1, 82, 80, 29
Patch: LV2, BP7, JC1, TB4, OR3
Mushrooms: DR6, DR4, CR8, 33,27, 24
Stalks: GG3, GG2, GG1, BLENDER
Grass: 60, 47
Flowers: PP1 35, 29
Table cloth: IB3, IB2, IB1
Leaves & Twigs: LG4, LG2, LG1, EB3
Cups and tea pot: PP5, GG3, GG2, GG1, BLENDER


Monday 11 May 2015

Fabric Flowers


         Hey every back with another post, I have been a little busy for the last two weeks, my friend is having a baby, and I have been making lots of goodies for her and the new bubs, This is where the inspiration has come from for this post, I made her a little bag and put some things in for her, just like face masks and things, But once I finished the bag I felt like it was missing something so I made a little flower brooch and I feel it brings the project together and they are so easy to make. The bag was from pattydoo's website www.pattydoo.de , please go over a check it out, the website is in German, She has also done video tutorials and they are very clear and easy to follow along with.

The Equipment: 

- Scissors,
- Fabric,
- Super glue, nothing special mine is from the local pound shop,
- A strong all purpose glue, or a glue gun if you have one, I don't at the moment,
Needle and thread,
-A circle template, you could cut free hand but my circles end up looking square,
- A button and something to cover the centre. (I got these little flat back pearl flower embellishments from e-bay they were 99p for 50 and free p&p so a real bargain)
- A small piece of felt (I prefer back because it hides a multitude of sins )
- At last a safety pin 


Knot the end of your thread, and making sure you leave a long tail.


Fold one circle in half and sew a long stitch along the bottom edge. 


Gather the petal and secure by going back to the beginning and pushing the needle all the away through. This bit can be a little tricky but stick with it, it will go.
  

Add the next petal doing the same as before, making sure you secure the petal, before adding the next one but this time you don't need to go through to the beginning to secure it just go through about a quarter of it.


Once all the petals are on tie the two end threads together a few times, making sure you leave the needle still attached.


Sew a button into the centre (if you have a glue gun you could use that) and Super glue in the centre flower embellishment.


Cut out a small circle out of felt, making sure its big enough to cover up the hole on the back, place the safety pin in place and using a matching thread sew around the bar.


using strong all purpose glue on the back of the felt, place in the middle on the back and leave to dry.


And your done.


Here are a few projects I have used these flowers on

Hope you have enjoyed this tutorial

Happy Crafting! 


Wednesday 15 April 2015

paper flowers


Diy Simple Paper Flowers


Hey guys time for my second post and this one is about diy paper flowers. ok so here goes

The equipment you will need:
- Die Cut Machine
- Sizzix Scallop Nest Dies (I used the second to smallest size)
-Pencil
-Double Sided Tape.
-Scissors.
-Distress Ink (the colours I have used are from Tim Holtz Peacock Feathers, Spun Sugar, Tattered Rose, milled lavender, Broken China, Antique Linen, and Peeled Paint).
-Card. (mine is 210 gsm)
-Little Gems For Decoration.


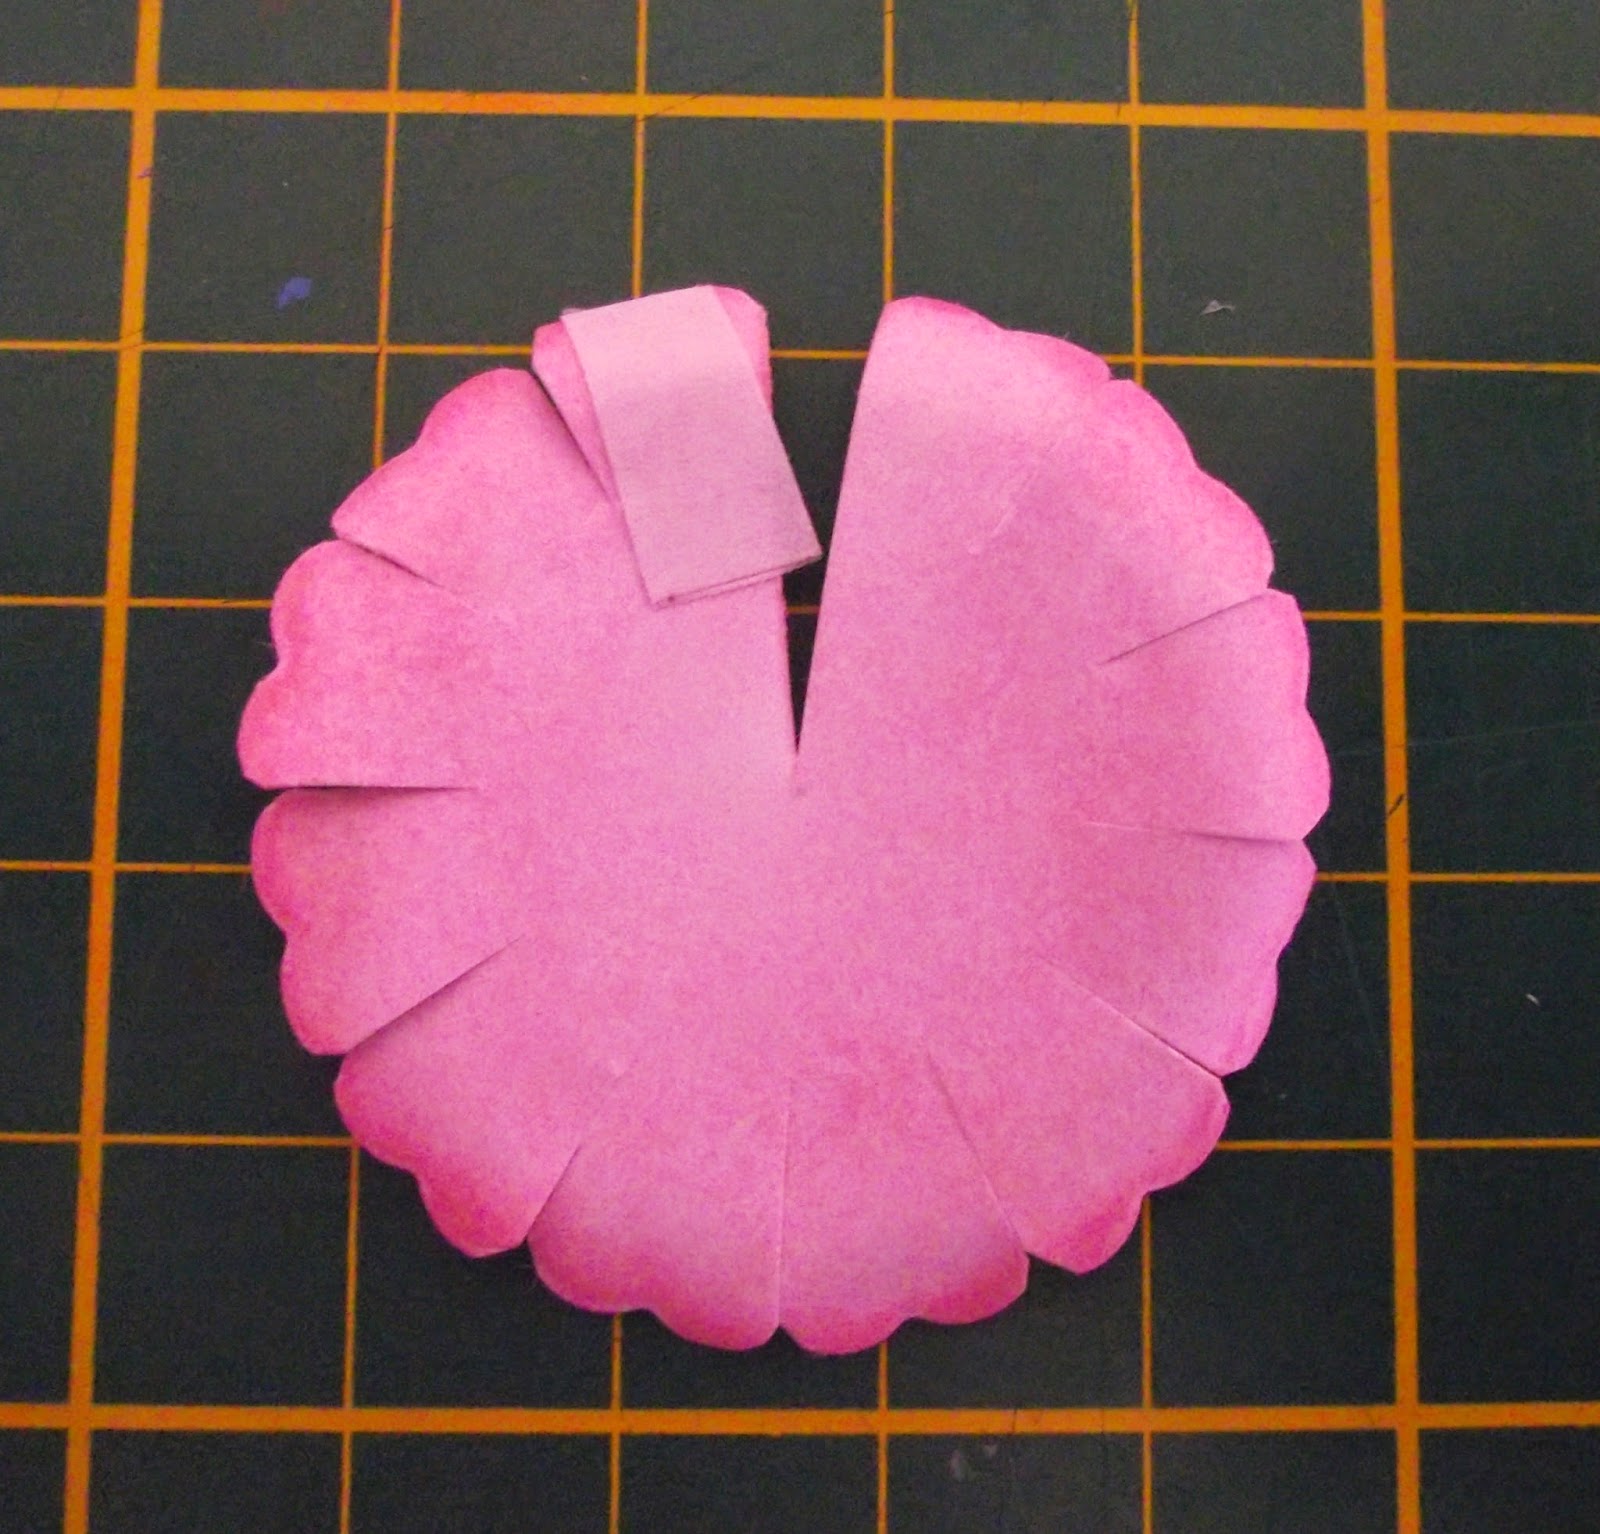
Start by cutting out your Scallop, Mark the middle with a pencil.


Next cut out one scallop in a v shape down to the centre, If you have an eraser handy rub out the dot, If not don't worry just turn it over. No one will see it once its stuck down on your project. 


Now time for the messy bit, The distress ink.
I started off by applying light layer and building it up on the edges.
I do make my own ink applicators (if you would like to know how leave me a comment and I will show you).
 
 
Every 2 scallops cut about 1 cm down try and angle the scissors towards the centre that way you will get a nice cut on the petal.
 
 
Carefully clip the edges of the petals.
 This will help define the petal and just give it a nice shape.
 
 
Next Put a little bit of double sided tape on one side of the v shape you cut earlier.
 
Now you need to curl the petals, very carefully use a pair of scissors on the underneath of the flower, One petal at a time be careful not to pull to hard otherwise you might pull the petals off (I done this a couple of times) This is what the should look like back and front.


Time to stick together. Pull off the backing paper to the tape and carefully pull over the other side and line up the top of the petals. if they don't line up completely you can always trim them, You may want to gently re curl the petals until your happy with the out come. Then place your embellishment or what where you are going to use in the middle.


They are really nice simple flowers and I cant wait to use them on a project, and to be honest with you they don't take to long to make, They took me about 20 minutes to make 5 of them. The one at the very bottom and the blue flower to the right where made the night before.
 
I hope you enjoy this tutorial on Simple paper flowers.
Please feel free to leave a comment,
Happy crafting!